We all know that having a Google+ profile from the search engine giants is pretty important if you want to have another footprint in the world of social media. A lot of people don’t see the point because of Facebook, Twitter, and some other already established social media companies, but I personally love Google+. It’s also a really good social media avenue for business too! I feel it delivers more important content for my personal interests. It’s clean, well developed, and duh… it’s Google!
However, a lot of us who do have a profile along with a personal and/or business website aren’t taking into consideration the potential SEO and CTR (click-through-rate) benefits from using the special ‘rel’ attributes created by G that can be put into your website’s markup. In this post, I am going to briefly explain how to link your online content from your website to your business and personal profile pages using Authorship rel="author" and Publication rel="publisher". There is a difference, but you should be using them both at the same time.
Why Are These Google ‘rel’ Attributes Important?
The Big G is piloting the display of author information in search results to help users discover great content. The quality of that content is important for ranking high. Google is making sure that it is not just about the content, but the author and who owns it. Authorship will become increasingly powerful in the coming years.
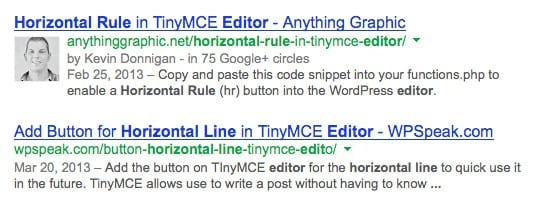
When you search for information using Google (most other search engines are using them to deliver results nowadays), you might have noticed that some of these results stand out more than others.

See that little image in the screenshot above? That’s my Google+ profile image accompanied by one of my blog posts that showed up on the SERP (search results page) for horizontal rule in editor. That makes a search result standout and if that person is in one of your circles, you’ll recognize him or her and most likely click that link because it’s information that a person you know has written. This is the result of setting up Google Authorship.
Setting Up Google Authorship
This is fairly simple process, especially if you are using the Genesis Framework for WordPress.
- Obviously, you are going to need a personal Google+ Profile Page.
- You’ll need to set a recognizable head shot as your profile image.
- Now, you have to associate your profile page with your website or the articles you write for other websites. There are different ways you can go about adding this same code into your articles, but I would suggest putting it in the
<head>section of your website:<link href="http://your-google-plus-profile-url" rel="author">or in the User Profile settings in your WordPress setup or somewhere else on your websiteFollow me on <a href="http://your-google-plus-profile-url" rel="author">Google</a>.
Now, pound your Staples Easy Button.
Setting Up Google Publisher
Now you understand that Authorship is for the author of the content. Whether you wrote an article for your own website or someone else’s, make sure you are getting credit for this content by including the link to your profile along with the rel attribute of author and watch your results on the SERP’s stand out.
Finally, the rel attribute called Publisher. I like to think of the hierarchy between Authorship and Publisher as a book. Dalton Trumbo is the author of Johnny Got His Gun, but the publisher is Citadel. I am the author of this blog post, but the publisher is Anything Graphic.

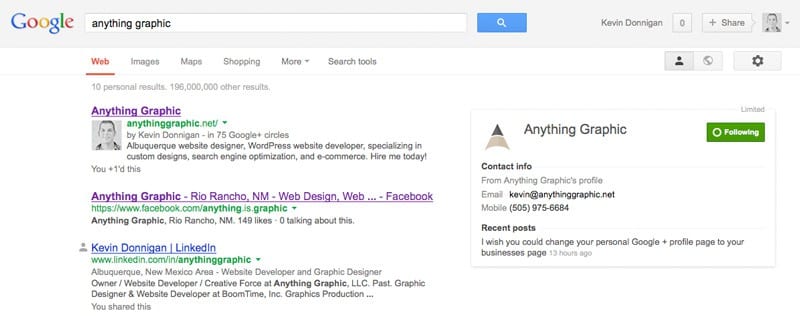
You’ve already seen why my profile photo shows up next to some search results in the left column, but setting up Google Publisher markup lets you have a big box to the right of the search results for queries related to your brand. Pretty cool huh? If you initially set your profile up to be a local business, you will have a map and photos relating to your Google Places For Business page as well. It all syncs together 🙂
This is also very simple to set-up. However, there are two key differences.
- First, you need to set a Google+ Business Profile Page.
- Next, follow the same Step (3) as in the Google Authorship section above, except change
rel="author"torel="publisher".
Testing Your Markup
Once you have placed the markup above into your website and blog posts, it will take a day or so for the search engine to update. But you can test how your markup performs and if it passes by using the Google Rich Snippets Structured Data Testing Tool. Just put in your homepage or blog post URL and click the Preview button. The test results will give you some information regarding your code and ways you can improve it if the steps above have not been completed successfully.
What’s Next?
My next blog post is going to be all about Google Rich Snippets and how they can help SEO and CTR as well. It’s pretty intense, but with the power of WordPress, it becomes easy 🙂
More Hints, Tips, & Tricks
If you have any more information regarding the rel attributes provided by Google and your G+ profile pages, let us know!
Tagged with: google, rich snippets, seo